-
Select Class Search and Enroll.

Mobile Navigation
The left hand navigation menu on a mobile device will be represented by a blue box with two vertical white lines.
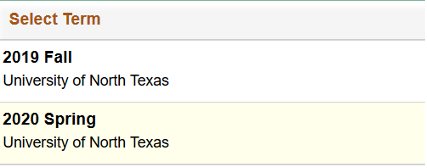
Depending on your device and browser, you will either see the left navigation menu, or a blue arrow at the top left of your screen. - Your active terms will display, select the term for which you would like to register.
-
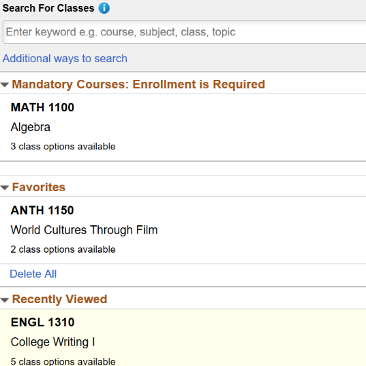
Once you select a term, you will be brought to a page where you can Search for Classes. You can search in several ways.
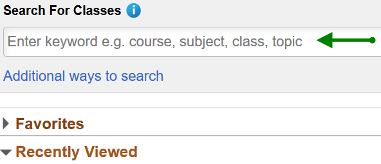
- Enter in the desired class in the Search for Classes field.
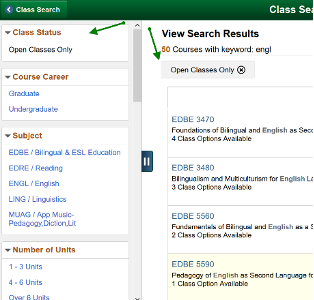
This will return a list of search results. You can scroll through the results and/or filter the search more using the options (like meeting days) on the left hand side.
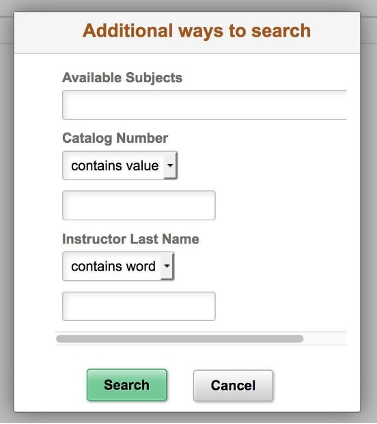
- Click the Additional ways to search link that will give you options to search available subjects, catalog number, and
instructor last name.
This will return a list of search results, which you can filter using the options to the left.
-
You may also see classes saved in Favorites or Recently Searched.
Mandatory courses: If you have mandatory courses that you must be enrolled in you will also see those classes listed.
- Enter in the desired class in the Search for Classes field.
-
Once you select the class to which you would like to register, click on the section and you will be taken to the registration steps.
-
Review Class Section.
To review the full class information including the meeting information, enrollment requirements and notes, class details, and number of students enrolled click on the linked class number.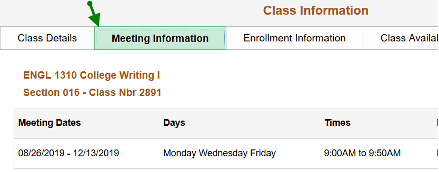
-
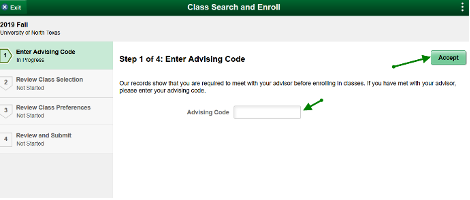
Advising Requirement Hold.
If you have an Advising Requirement Hold on Enrollment, then your step 1 will indicate Enter Advising Code and will have a box for you to enter the four-digit code that has been provided for you by your advisor. Enter that code and hit accept to proceed to the Review of the class selection.Once a valid code has been entered and Accepted the advising requirement hold will be automatically removed.
-
Review Class Preferences.
Enter a permission number only if you were given one by your advisor or academic department. Not all classes require a permission number so if it is not required for your selected class just click Accept to continue.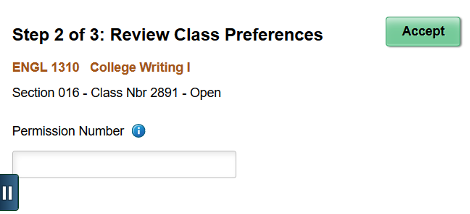
Click the Accept button in the upper right of your screen or the Review and Submit option on the left navigation.
-
Add class to shopping cart.
If it is during your registration appointment time you will be asked if you want to Enroll in the class or if you want to add the class to your Shopping Cart. If it is not your time to register you can still add classes to your Shopping Cart.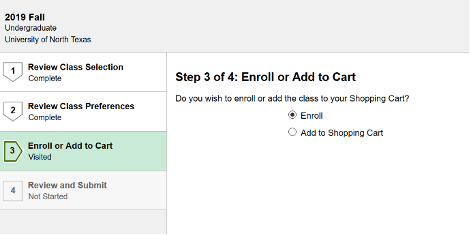
Please Note: If you add the class to your shopping cart, you are simply saving the class to add it later. Your seat is not saved and the class can continue to fill.
-
Submit and Confirm.
Once you have reviewed the class information, click the Submit button and confirm you want to submit.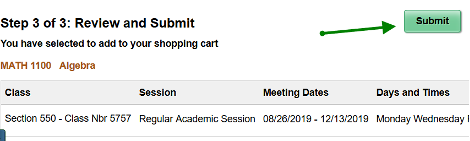
Please note: By adding the class to your Shopping Cart, you are simply saving the class to actually enroll later. Your seat is not saved and the class can continue to fill.
-
-
To enroll in classes that have been added to your Shopping Cart, select the Shopping Cart on the left hand navigation.
-
Select class from list.
You will be taken to a list of the classes you have added to your shopping cart.Change class preferences, like the number of credits on a variable credit class, by clicking the link to the far right.
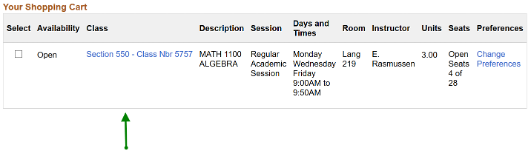
Please Note: You can use the Validate button to verify your eligibility to enroll in your selected classes and look for errors prior to attempting to Enroll.
If you do not have the button to enroll or validate, please verify that it is a valid time for you to be allowed to register by clicking Enrollment Dates from the menu on the left.
-
Enroll.
Click the check mark to the left of the class. Mark the class(es) to which you would like to enroll.Then click Enroll.
-
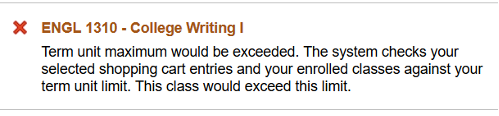
Confirm.
You will be asked if you are sure, if you click Yes you will be taken to a screen that will indicate if you have been successfully registered for your class(es).If you are unable to register due to time conflicts, registration periods passing, or some other reason, you will see a detailed message indicating why you were not enrolled in the course.
You must address the reason first, then return to myUNT and try to enroll in the course again.
-
Adding Courses
How to Add Courses
Registration Resources
- Registering for Courses through myUNT
- Swapping Courses
- Dropping Courses
- Course Drop/Withdraw Actions and Impacts
- Enrollment Address
Questions? Scrappy has answers!
Scrappy Says is your online resource for help topics about course registration, records, financial aid, your student account and more. Find answers or schedule an appointment today!